4.6. ConfigMaps
Overview
The ConfigMaps page manages every ConfigMap held on the MCM control plane in one place. A ConfigMap is the Kubernetes resource that stores the configuration data a containerised application needs, as key-value pairs.
What it is for:
- Managing multi-cluster ConfigMaps together
- Holding application settings centrally
- Separating and managing settings per environment
- Distributing settings through a PropagationPolicy
Where ConfigMaps are used:
- Application configuration files (application.properties, config.yaml)
- Storing environment variable values
- Command-line argument settings
- Mounting configuration files (nginx.conf, redis.conf and so on)
- Feature flags and runtime settings
How the Screen Is Laid Out
The ConfigMaps page shows the ConfigMap list as a table.
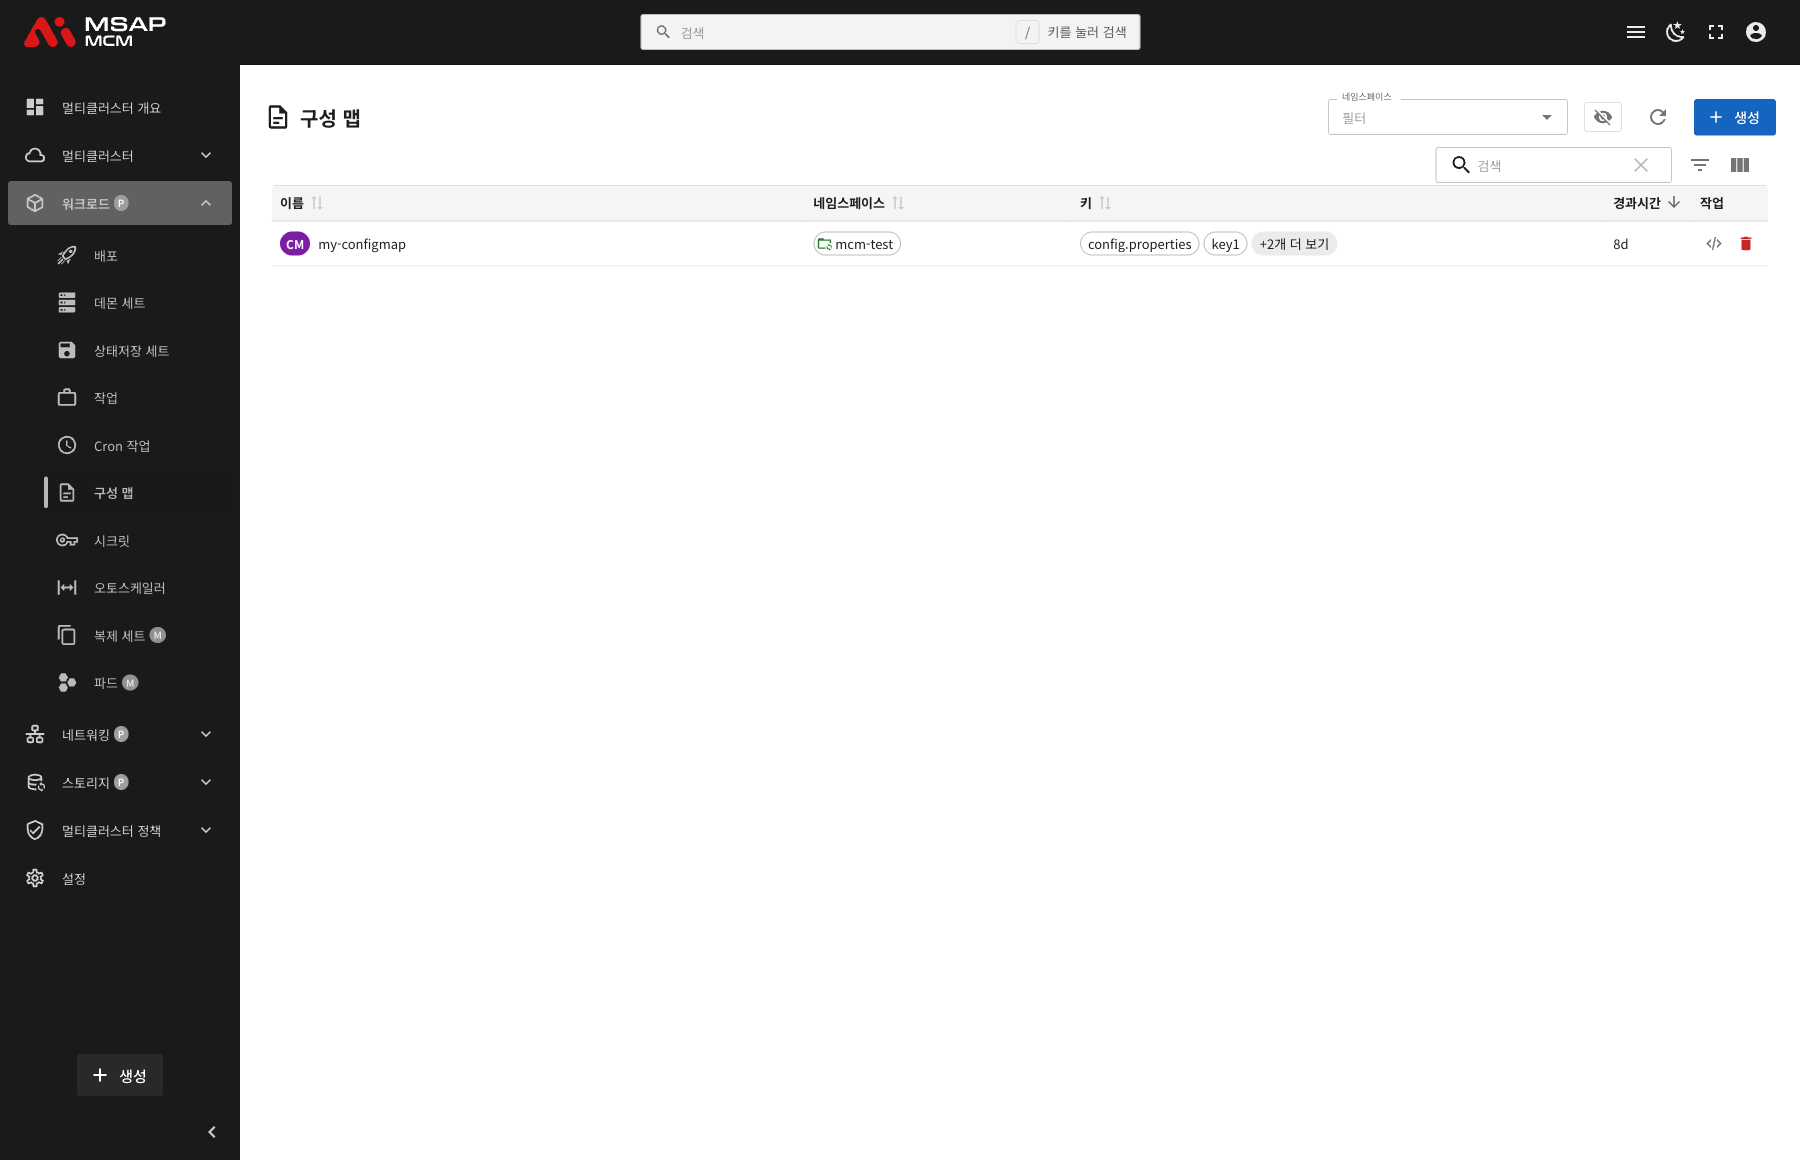
The Elements at the Top of the Page
| Element | Description |
|---|---|
| Namespace filter | Shows only the ConfigMaps of a particular namespace |
| Include system namespaces | Toggles showing the ConfigMaps of system namespaces (kube-system and so on) |
| Refresh button | Refreshes the ConfigMap list |
| Create button | Opens the dialog for creating a new ConfigMap |
| Search box | Searches by ConfigMap name |
Table Columns
| Column | Description | Sortable |
|---|---|---|
| Name | The ConfigMap name | ✅ |
| Namespace | The namespace the ConfigMap belongs to | ✅ |
| Keys | The list of data keys stored (beyond 3, shown as "+N more") | ✅ |
| Age | The time since the ConfigMap was created | ✅ |
| Actions | The edit and delete buttons | - |
How the Keys Are Shown
The Keys column shows the data keys stored in the ConfigMap:
- The first two or three keys are shown as badges
- Where there are many keys, the rest are abbreviated as "+N more"
- For example
config.properties,key1,+2 more
ConfigMap Detail
Clicking a ConfigMap row opens the detail panel.
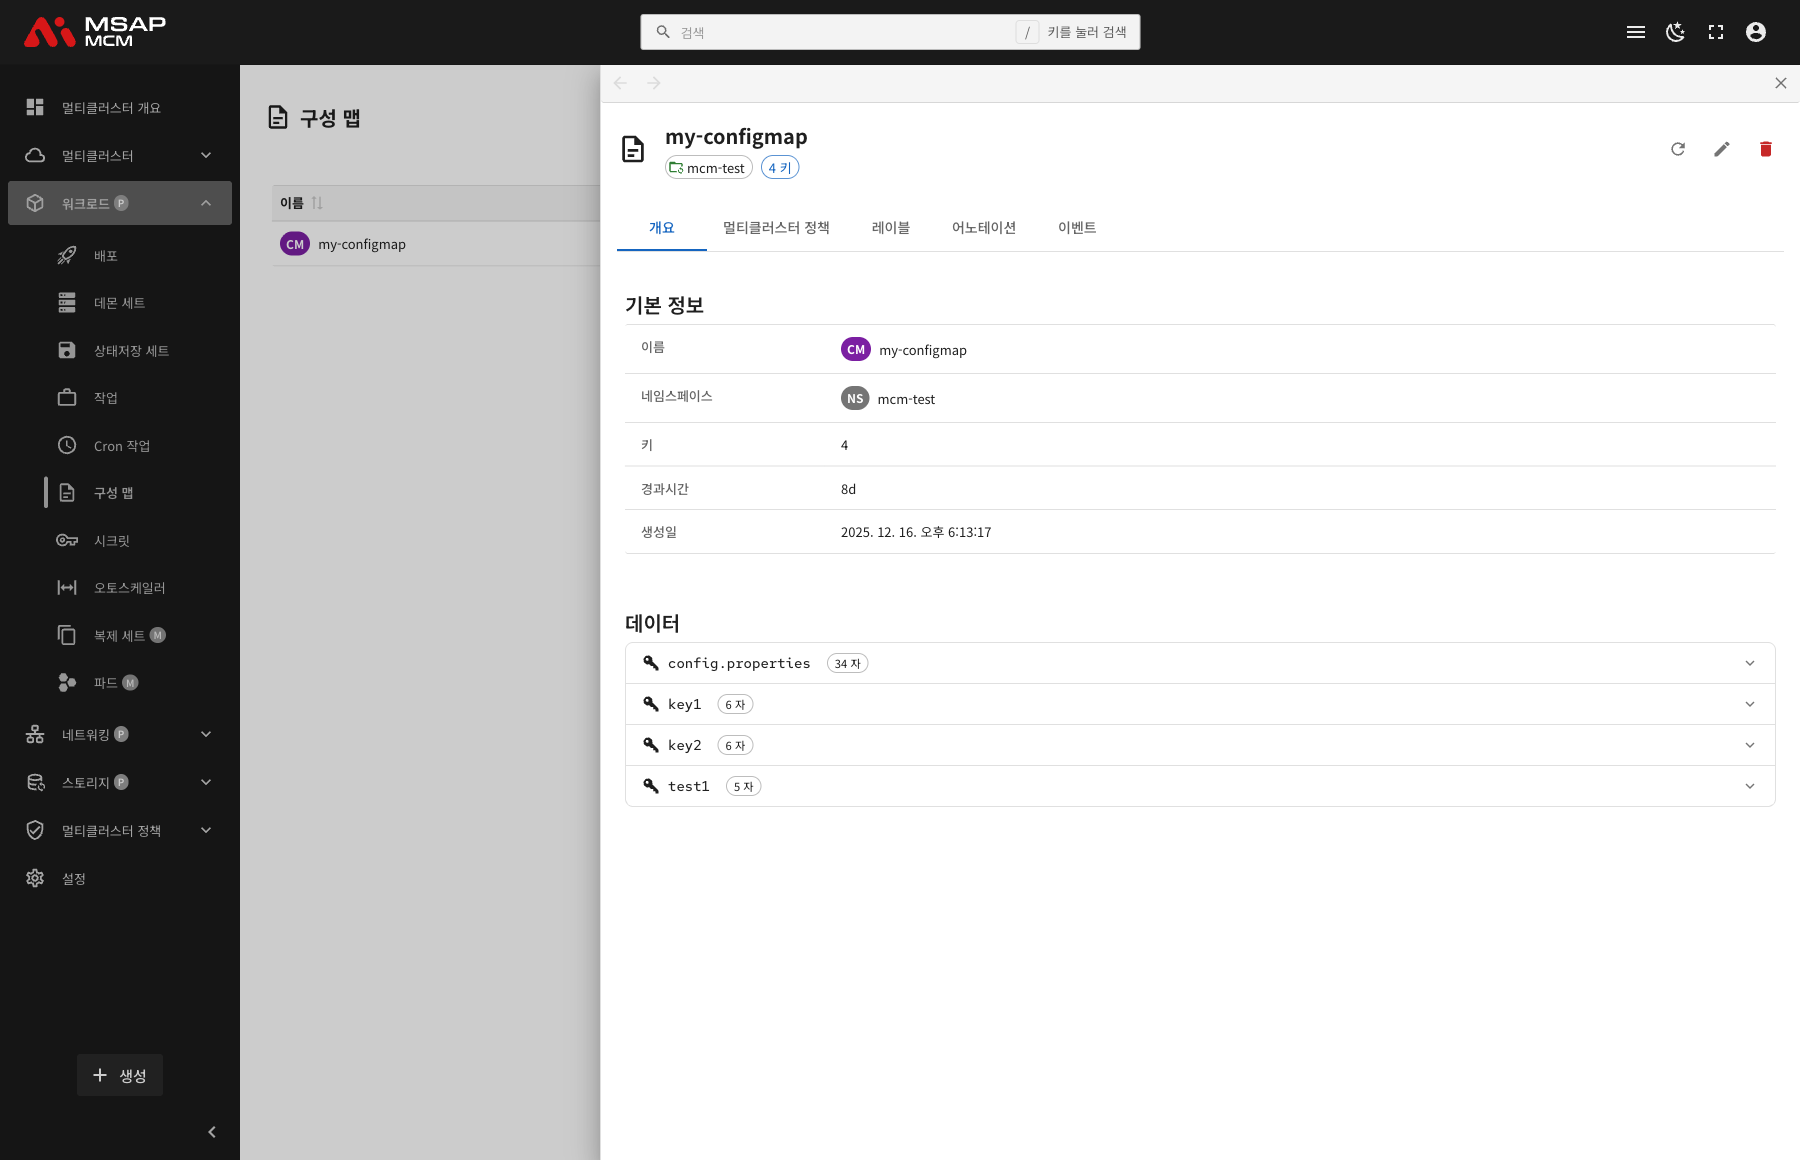
The Detail Panel Header
| Element | Description |
|---|---|
| ConfigMap name | The name of the chosen ConfigMap |
| Namespace | The namespace the ConfigMap belongs to |
| Key count | The number of data keys stored (4 keys, for example) |
The Action Buttons
| Button | What it does |
|---|---|
| Refresh | Refreshes the ConfigMap information |
| Edit | Opens the YAML edit mode |
| Delete | Deletes the ConfigMap |
The Tabs
The Overview Tab
Shows the ConfigMap's basic information and its data.
Basic information:
| Item | Description |
|---|---|
| Name | The ConfigMap name |
| Namespace | The namespace the ConfigMap belongs to |
| Keys | The number of data keys stored |
| Age | The time since creation |
| Created | When the ConfigMap was created |
Data:
Each data key is shown as an accordion:
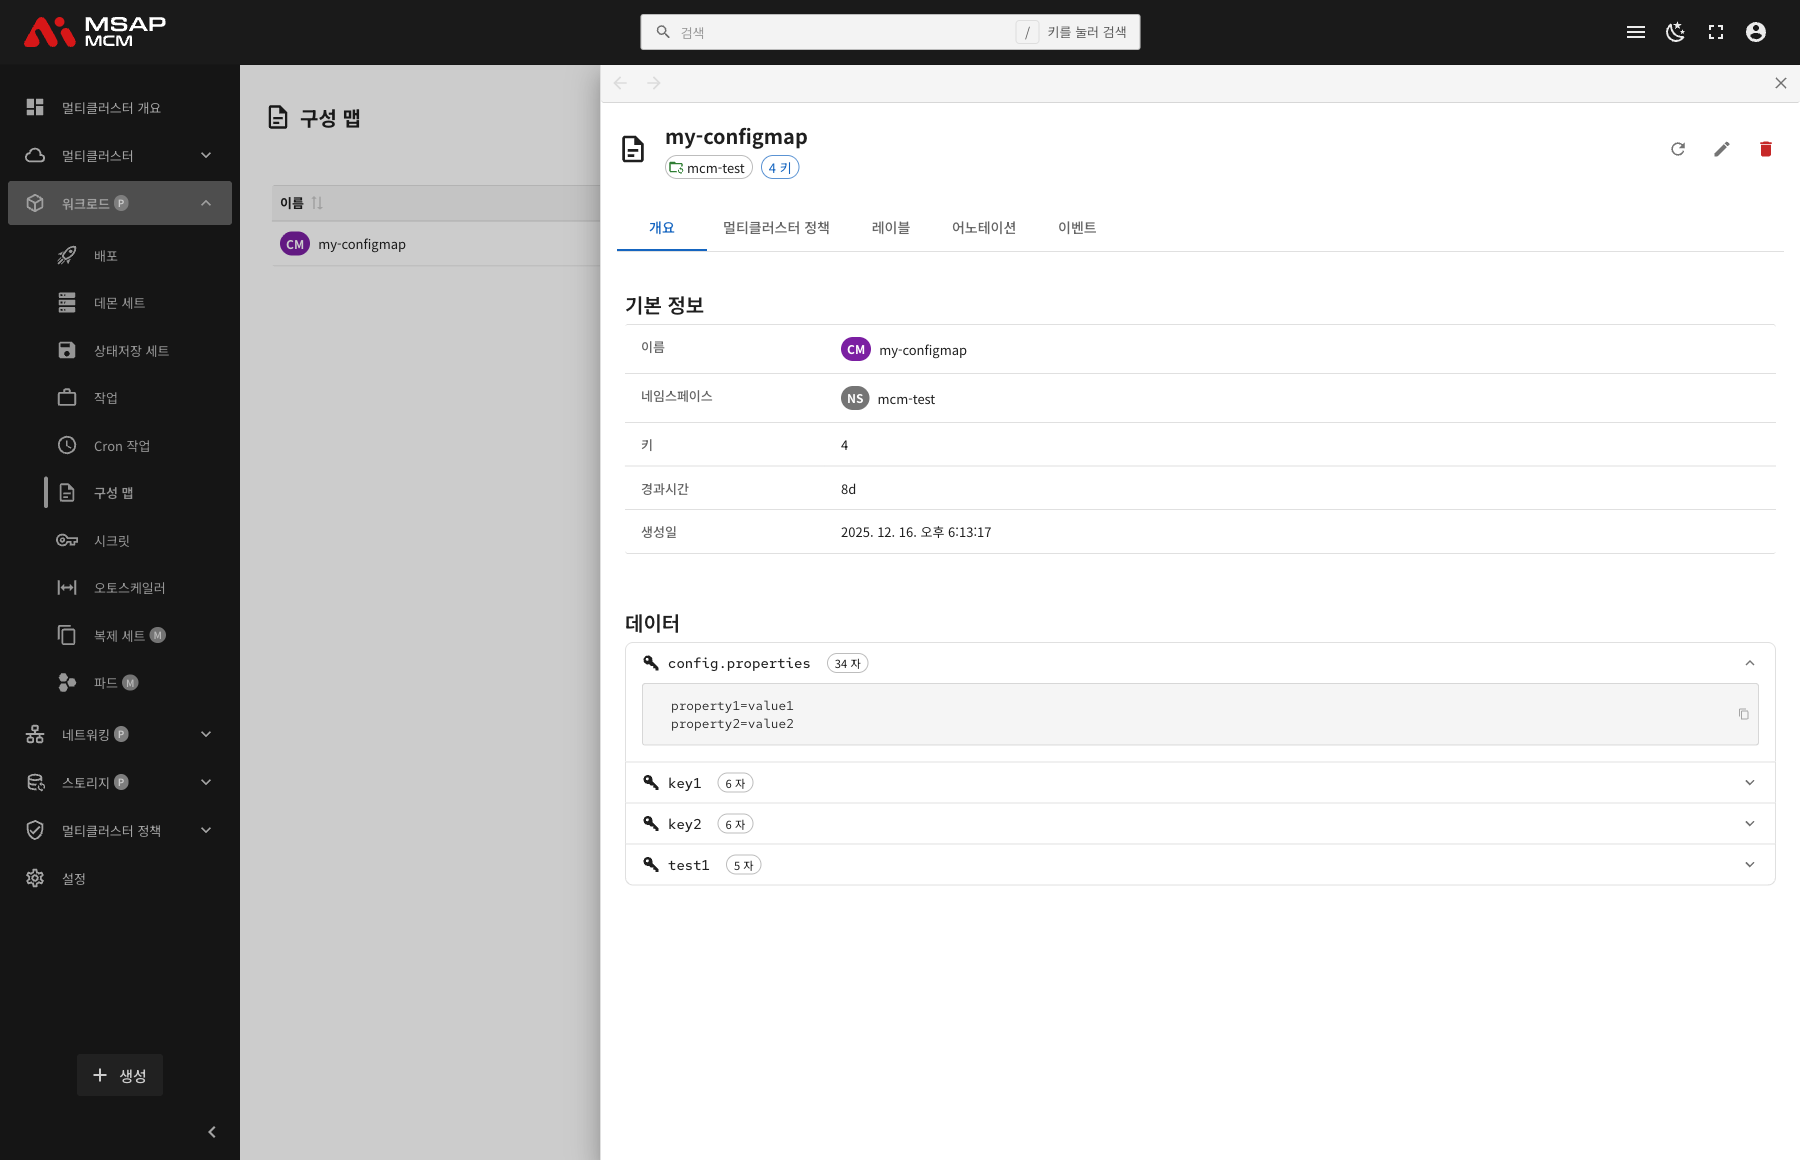
| Element | Description |
|---|---|
| Key name | The data key name (config.properties, for example) |
| Data size | The number of characters in the value (34 chars, for example) |
| Expand/collapse | Click to show or hide the data |
| Copy button | Copies the data to the clipboard |
Clicking a key expands it to show that data.
The Multi-Cluster Policies Tab
Shows the multi-cluster policies that apply to the ConfigMap.
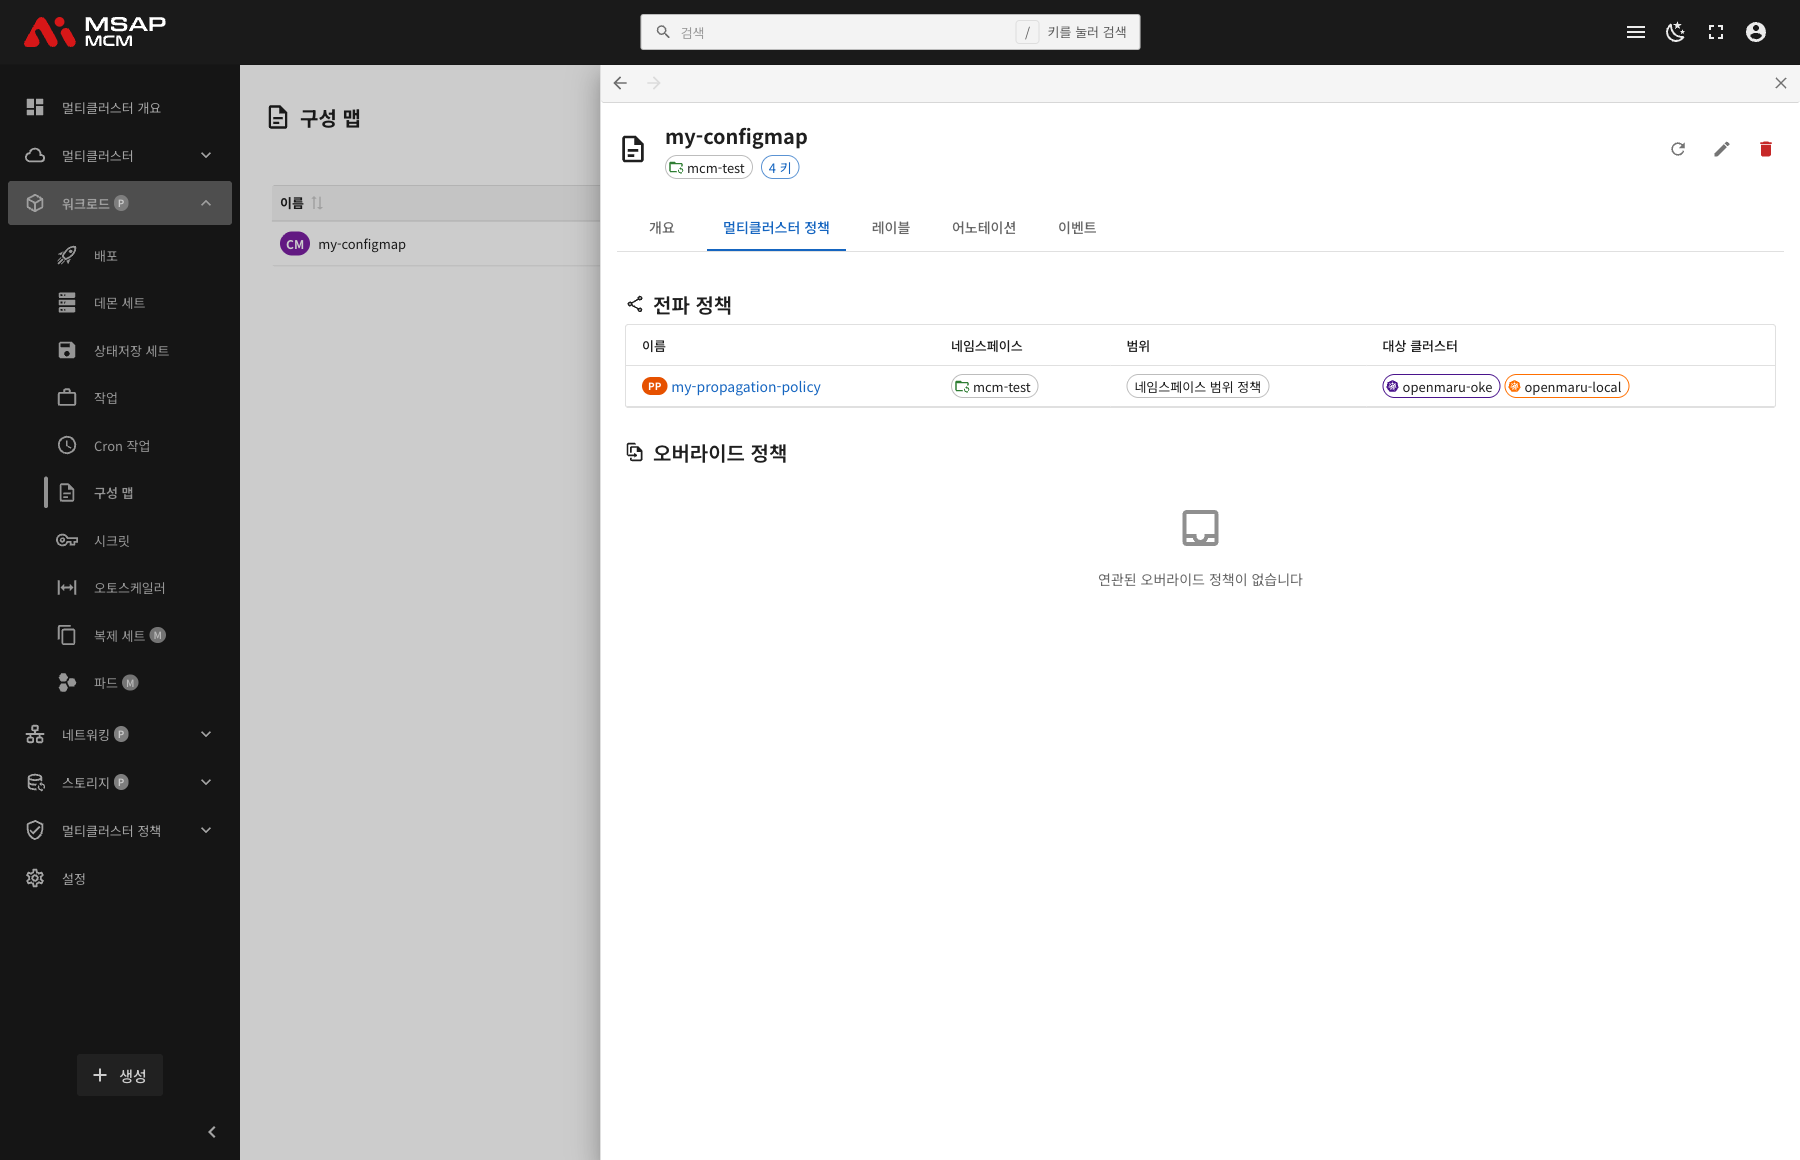
PropagationPolicy:
| Column | Description |
|---|---|
| Name | The PropagationPolicy name |
| Namespace | The namespace the policy belongs to |
| Scope | Namespace-scoped policies / cluster-scoped policies |
| Target Clusters | The list of target clusters |
OverridePolicy:
Shown where there are per-cluster custom settings.
The Labels Tab
Shows the list of Kubernetes labels applied to the ConfigMap.
The Annotations Tab
Shows the list of annotations applied to the ConfigMap.
The Events Tab
Shows the Kubernetes events related to the ConfigMap.
Creating a ConfigMap
Creates a new ConfigMap on the MCM control plane.
Fields
| Field | Required | Description |
|---|---|---|
| Name | ✅ | The ConfigMap name |
| Namespace | ✅ | The namespace to deploy into |
| Data | ✅ | The key-value pair data |
Ways to Enter the Data
Form entry:
- Enter the key-value pairs one at a time
- Key: the data key name (database.host, for example)
- Value: the data value (localhost, for example)
- The add button lets you enter several key-value pairs
Editing the YAML:
- The "Edit YAML" tab lets you write the ConfigMap definition directly
apiVersion: v1
kind: ConfigMap
metadata:
  name: my-config
  namespace: default
data:
  database.host: localhost
  database.port: "5432"
  config.properties: |
    property1=value1
    property2=value2
ConfigMap Operations
Editing a ConfigMap
- Choose the ConfigMap
- Press the "Edit" button in the detail panel
- Change the ConfigMap definition in the YAML editor
- Press the "Save" button
Note: changing a ConfigMap does not reach pods that are already running straight away. The pods have to be restarted for the change to take effect.
Deleting a ConfigMap
⚠️ Caution: deleting a ConfigMap can cause errors in the pods that reference it. Check what references it before deleting.
- Choose the ConfigMap to delete
- Press the "Delete" button in the detail panel
- Type the ConfigMap name in the confirmation dialog
- Press the "Delete" button
Worked Examples
Scenario 1: Creating an Application Settings ConfigMap
- Press the "Create" button
- Enter the ConfigMap details:
- Name:
app-config - Namespace:
production - Data:
database.host:db.example.comdatabase.port:5432log.level:INFO
- Name:
- Press the "Create" button
- Name the target clusters with a PropagationPolicy
- Reference the ConfigMap from the application Deployment
Scenario 2: Creating a Configuration File ConfigMap
- Press the "Create" button and choose the Edit YAML tab
- Write this YAML:
apiVersion: v1kind: ConfigMapmetadata:name: nginx-confignamespace: webdata:nginx.conf: |server {listen 80;server_name localhost;location / {root /usr/share/nginx/html;}}
- Press the "Create" button
- Mount it as a volume in the Deployment
Scenario 3: Checking ConfigMap Data
- Click the ConfigMap you want to check in the list
- Look at the Data section on the Overview tab
- Click the key you want to expand it
- Read the data
- Copy it to the clipboard with the copy button if needed
Scenario 4: Deploying a ConfigMap Across Clusters
- Create the ConfigMap
- Create a PropagationPolicy:
- Resource selector: name the ConfigMap
- Target clusters: choose the clusters to deploy to
- Check the "Multi-Cluster Policies" tab in the detail panel
- Confirm the ConfigMap has been deployed to the target clusters
Scenario 5: Managing Settings per Environment
- Create a ConfigMap for development:
- Name:
app-config - Namespace:
dev - Data: the development settings
- Name:
- Create a ConfigMap for production:
- Name:
app-config - Namespace:
prod - Data: the production settings
- Name:
- Apply a PropagationPolicy per namespace
- The same application then uses different settings per environment
Related Concepts
ConfigMap against Secret
| Trait | ConfigMap | Secret |
|---|---|---|
| Purpose | Ordinary configuration data | Sensitive data (passwords, tokens) |
| How it is stored | Stored as plain text | Stored Base64-encoded |
| Security | Ordinary | Restricted access and an encryption option |
| Size limit | 1MB | 1MB |
| Examples | Configuration files, environment variables | Passwords, API keys, certificates |
How to Use a ConfigMap
1. Injected as an environment variable:
env:
  - name: DATABASE_HOST
    valueFrom:
      configMapKeyRef:
        name: app-config
        key: database.host
2. The whole ConfigMap as environment variables:
envFrom:
  - configMapRef:
      name: app-config
3. Mounted as a volume:
volumes:
  - name: config-volume
    configMap:
      name: app-config
volumeMounts:
  - name: config-volume
    mountPath: /etc/config
Managing ConfigMaps Across Clusters
When deploying a ConfigMap to several clusters through MCM:
PropagationPolicy:
- Copies the same ConfigMap to several clusters
- Chooses the clusters and sets the deployment strategy
OverridePolicy:
- Applies different values per cluster
- Manages the differences in settings between environments
For example, a different database host per cluster.
How ConfigMap Updates Take Effect
Points to watch when changing a ConfigMap:
- Not immediate: pods already running are not updated as soon as the ConfigMap changes
- Volume mounts: where it is mounted as a volume, it updates automatically after a while (60 seconds by default)
- Environment variables: where it is injected as an environment variable, the pod has to be restarted
- Rolling update: restarting the Deployment applies the new settings
# roll-restart the Deployment
kubectl rollout restart deployment/my-app -n namespace
Next Steps
- Secrets -- managing multi-cluster Secrets
- Deployments -- managing the Deployments that use a ConfigMap
- Propagation Policies -- configuring a PropagationPolicy