3. Putting the Wallboard on a TV for the First Time
When you finish this chapter, the wallboard is open in fullscreen on the control room TV, and the same screen opens again when the PC restarts.
Wallboard settings (split, group per tile, alert thresholds) are saved in the browser profile, not on the server (chapter 9). So create a profile just for the wallboard first, then log in and change settings in that window. If you set things up in your usual browser window and then move to the dedicated profile, the settings do not come with you.
What you need
- A PC connected to the control room TV, with a browser (Chrome or Edge)
- An account for the wallboard. This is the account you log in with on the TV PC, and we recommend a separate account just for the wallboard. The groups you can see follow that account's permissions (chapter 9, "Accounts and Security").
- To use the alert band (chapter 8), that account must be a recipient of the alert policies.
Step 1: Find the wallboard address
Open the wallboard once from the console on an administrator PC and check its address.
- Log in to the APM console.
- Click the TV icon at the right of the top bar (a monitor shape, immediately to the right of the fullscreen button).
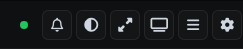
- The wallboard opens in a new window. If the browser blocks pop-ups, it opens in a new tab. Copy the address from the address bar.
The copied address carries the group and view you were looking at in the console.
https://<APM console address>/monitoring/console/wallboard/?group=order&view=app
Use the address with everything from ? onward removed. If you keep it, that group and view are applied every time the PC starts,
and the group per tile and server tiles you set in step 3 are overwritten each time (values in the address take precedence over saved settings).
https://<APM console address>/monitoring/console/wallboard/
The <APM console address> and /monitoring parts can differ depending on the installation, so do not type them yourself.
Remove only the part after ? from the copied address.
Step 2: Create a browser window just for the wallboard
On the PC connected to the TV, create a browser shortcut that opens the wallboard address directly, without an address bar.
| Browser launch option | Result |
|---|---|
--kiosk <wallboard address> | Fills the whole screen without an address bar or tabs |
--app=<wallboard address> | Opens a window without an address bar. You can resize the window |
--user-data-dir=<folder> | Pins the browser profile to that folder. The login state and wallboard settings are kept in this profile |
-
On the desktop, right-click ▸ New ▸ Shortcut.
-
For the item location, enter one of the following. The browser installation path can differ from PC to PC.
Chrome:
"C:\Program Files\Google\Chrome\Application\chrome.exe" --kiosk "https://<APM console address>/monitoring/console/wallboard/" --user-data-dir="C:\wallboard-profile"Edge:
"C:\Program Files (x86)\Microsoft\Edge\Application\msedge.exe" --kiosk "https://<APM console address>/monitoring/console/wallboard/" --edge-kiosk-type=fullscreen --user-data-dir="C:\wallboard-profile" -
To open it automatically when the PC starts, press Windows key + R, enter
shell:startupto open the Startup folder, and copy this shortcut into it.
Step 3: Log in and set up in the dedicated window
- Run the shortcut. The first time, the login screen appears.
- Log in with the wallboard account. After you log in, you return to the wallboard screen.
- Click the tile title (group name) and select the group to show. If the list is long, you can search it.
- To show several workloads together, click Settings (gear) at the top right ▸ Layout ▸ Screen split and select the number of tiles, then click each tile's title and select a group.
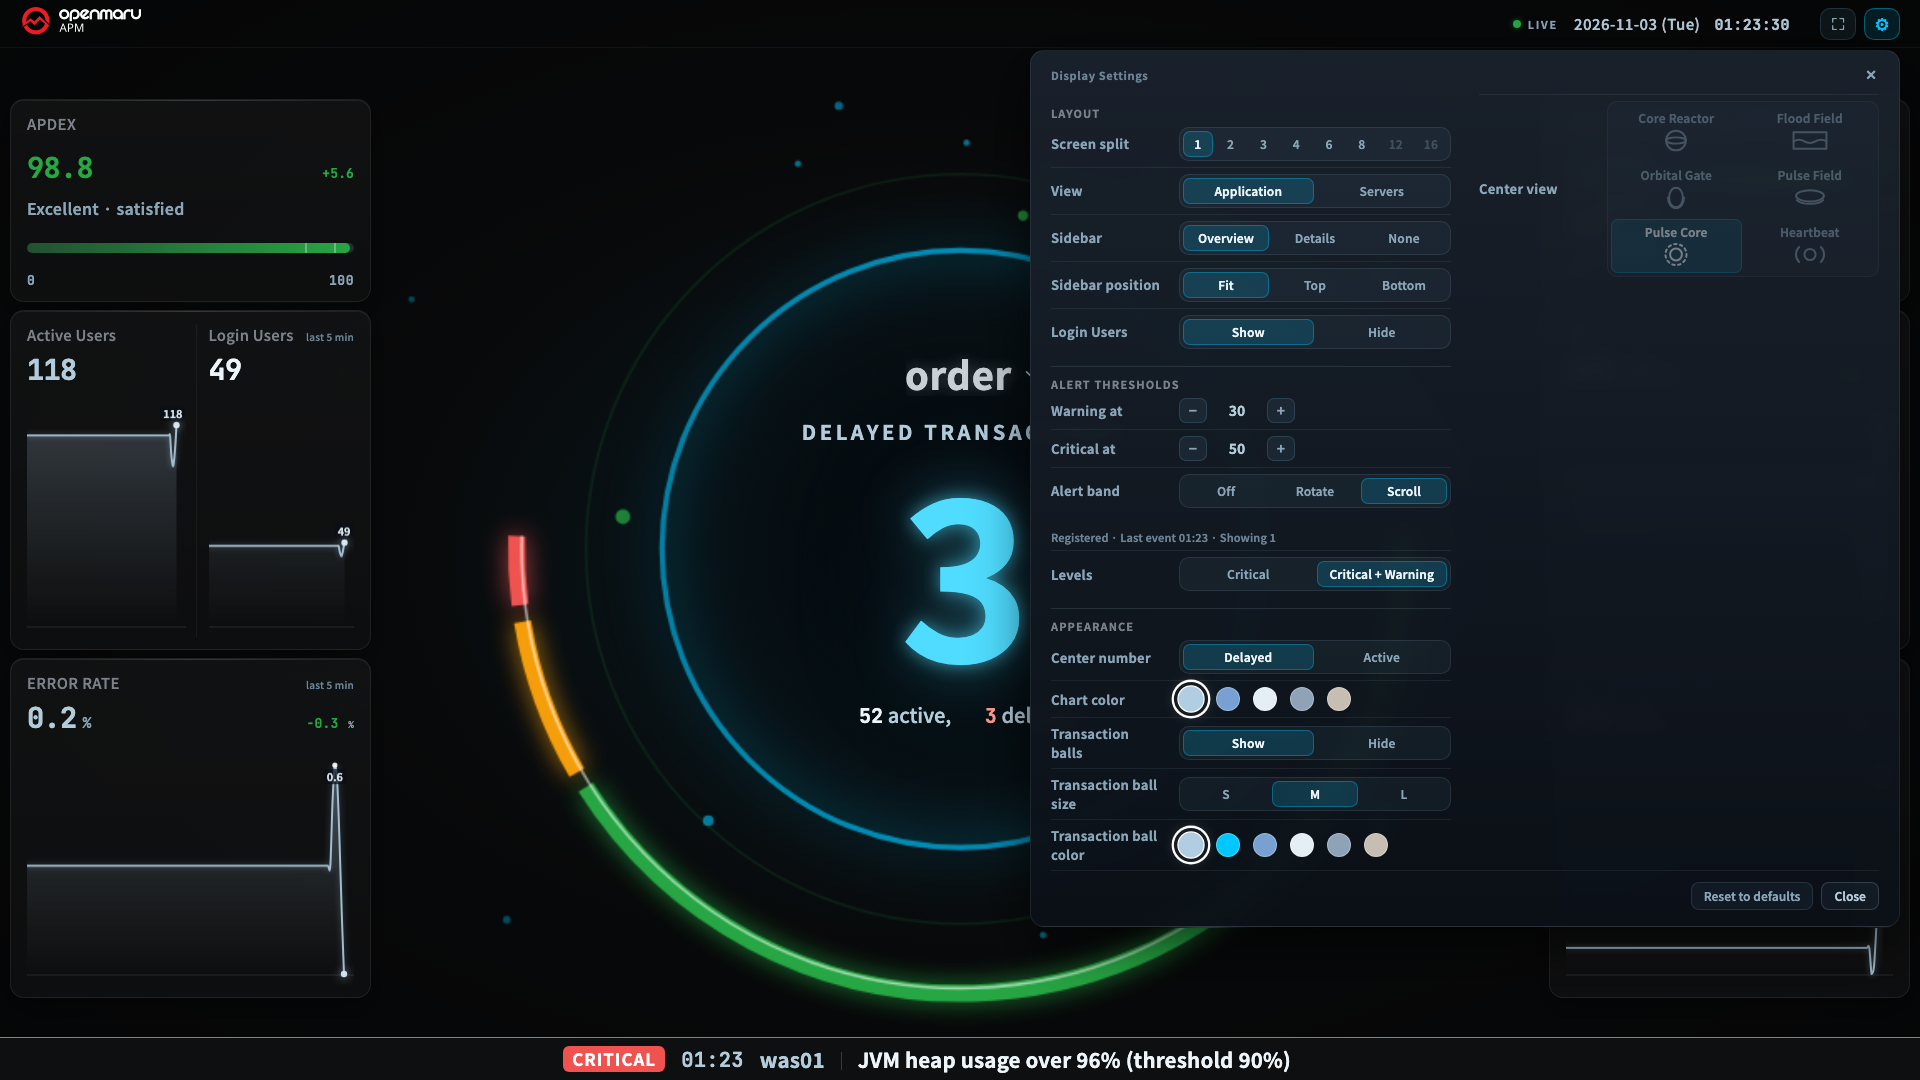
The values you select are saved in this dedicated profile. Chapter 6 explains the number of tiles and groups, and chapter 10 explains every setting.
You can also write the number of tiles, the group per tile, and the visual in the address. For example, to show order and payment in a 2-tile split,
write the shortcut's address as …/wallboard/?split=2&groups=order,payment. Values written in the address stay the same even if you change
the PC. However, some settings, such as the alert thresholds, cannot be set in the address (chapter 9, chapter 10).
Step 4: Check that the same screen appears after a restart
- Restart the PC.
- Check that the browser opens to the wallboard screen.
- Check that the split and groups you set in step 3 are unchanged.
- Check that the LIVE indicator at the top of the screen is green. If it is not green, see chapter 9.
If the login screen appears again, the server's login session has expired. Log in again (chapter 9, "When Your Login Expires").
To change settings after it is up
Even in kiosk mode, you can change settings by clicking Settings (gear) at the top right of the screen with a mouse. If you briefly connect a mouse to the TV PC and change a setting, the new value is saved right away. If you need to close the window, press Alt + F4; to open it again, run the shortcut.
Next steps
- If the large number is amber even in normal times, raise the alert thresholds to suit that workload: chapter 4
- To split one screen across several workloads: chapter 6
- To see server status: chapter 7
- To check accounts, security, and login persistence before unattended operation: chapter 9
Copyright (c) 2026. OPENMARU, Inc.