2. Installing the System Agent
What This Chapter Does
The system agent collects the state of one server and sends it to the APM server. It sees operating system resources such as CPU, memory, disk, and network, and the state of the web servers (Apache, NGINX), databases, and containers running on that server.
Why it is needed -- where the WAS agent sees "what happens inside the application", the system agent sees "whether the server that application sits on is all right". Telling whether a slow response is the code or a shortage of server resources needs both.
Where to install it -- one per server to be monitored. That covers not only servers running a WAS but also web servers and database servers. Unlike the WAS agent, it does not touch the application and runs as a separate process. That is why no WAS restart is needed.
Once installed -- the resource usage of that server is visible in the console's system menu.
The Installation Flow
| Step | What you do | Why |
|---|---|---|
| 1 | Download the installation file | The console provides the agent that suits this server |
| 2 | Unpack it and set the connection details | Tell the agent which APM server to send data to |
| 3 | Turn on plugins (optional) | Turn on the relevant plugin to see web servers and databases as well |
| 4 | Start the agent | Collection begins and the server appears in the console |
Step 3 can be skipped. To see only operating system resources, 1, 2, and 4 are enough.
The Structure of the System Agent

The agent has two layers, a core and plugins.
| What it does | Does it need configuration | |
|---|---|---|
| Core | Reads operating system resources (CPU, memory, disk, network) directly | Only the connection details -- there is no on/off concept |
| Plugins | Query other products running on the same server | They have to be turned on, and configuration is needed on the target product too |
Operating system resources are collected even with no plugins turned on at all. Plugins are added when there is a need such as "I want to see this server's Apache too".
The Installation Directory
Unpacking produces the structure below. There are only two kinds of file to edit.
khan-sys-agent/
├── bin/
│   ├── start.sh · kill.sh · tail.sh      start · stop · view logs
├── conf/
│   └── khan-sys-agent.conf               ← ① connection details (required)
├── plugins/
│   ├── disabled.txt                      ← ② which plugins to turn on
│   ├── khan-plugin-apache-5.1.0/         the plugin itself (do not touch)
│   └── khan-plugin-apache.conf/
│       └── config.properties             ← ③ plugin configuration (only for the ones turned on)
└── logs/
Why ③ goes in khan-plugin-apache.conf/ -- the same file exists in the plugin's own directory
(khan-plugin-apache-5.1.0/conf/) too, but that one is overwritten when the plugin is upgraded.
Keeping it in the .conf directory, which has no version in its name, makes the configuration
survive.
What You Want to Do -- What to Edit
| What you want | Where to edit | Section |
|---|---|---|
| See server resources | khan.host and khan.port in conf/khan-sys-agent.conf | Installation |
| See only particular network cards or disks | khan.network.interfaces and khan.disk.mounts in the same file | The configuration table |
| See Apache or NGINX | Turn it on in plugins/disabled.txt, and open a status page on the web server | Apache and NGINX |
| See HAProxy | The same, plus configuring the stats page in HAProxy | HAProxy |
| See a database | Turn on the plugin, create a read-only account in the database, and turn it on once more in the console | MySQL and Cubrid |
| See containers | Turn on the plugin and grant permission to read the runtime socket | Docker, CRI-O, and containerd |
| Stop and start the agent | bin/start.sh and bin/kill.sh | Starting and stopping |
| Install on many servers at once | "Copy install command" in the console | Inline installation |
Most need configuration on the target product as well. Apache has to have a status page opened, a database has to have an account with query permission, and a database has to be turned on once more in the console. Each is included in the plugin's section as "How to configure … for APM monitoring".
Downloading the System Agent
Download the installation file from the console. The on-premise and cloud versions differ only in the download screen; the steps after receiving the file are the same.
Settings > Guides & Downloads
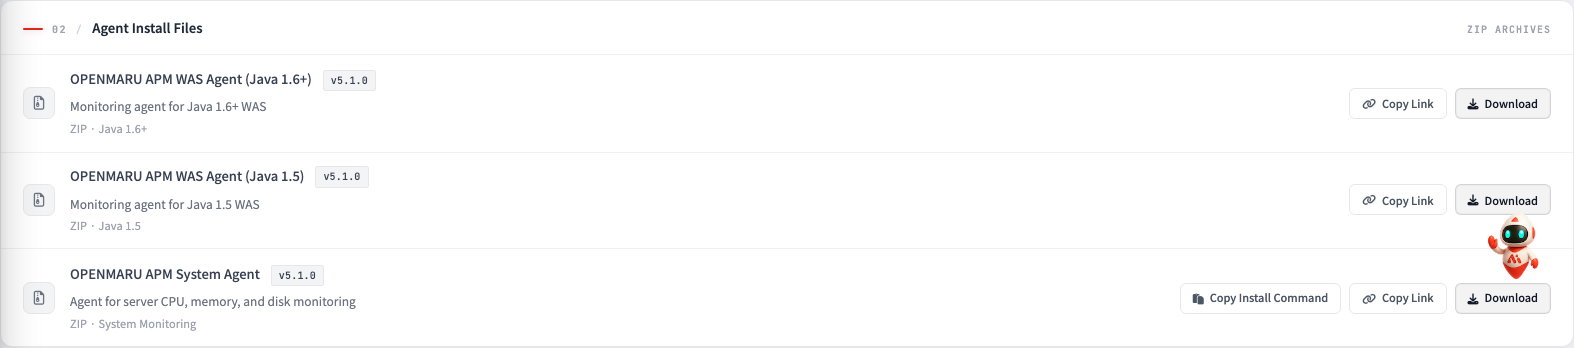
Download the file for installing the system agent.
Right-click the "Download" button and click "Copy link address".
If the installation target is a remote Linux server, fetching it there directly with wget using the
copied link address is faster. Below is the command form; use the address you just copied.
- Downloading the system agent
$ wget "<the copied link address>"
[Cloud only] Agent Installation Guide > SYS AGENT Tab
With cloud APM, the download location differs.
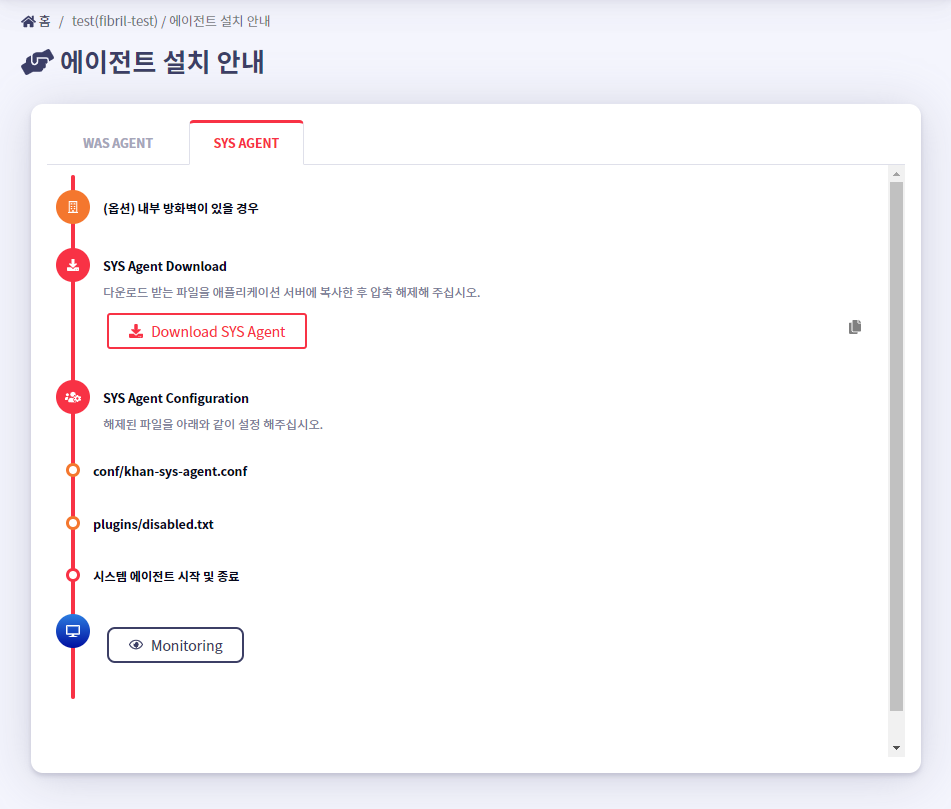
Selecting Agent Installation Guide > SYS AGENT gives a page where Download SYS Agent can be clicked, as below. From receiving the file onwards it is the same as above.
Installing the System Agent
- Unpacking the file
$ unzip sys-agent.zip
- Changing the agent configuration
$ cd khan-sys-agent
$ vi conf/khan-sys-agent.conf
- Setting the connection details
The file comes with defaults filled in, so only two lines need changing.
khan.host=192.168.0.77        # the APM server address (or domain)
khan.port=80                  # the APM server port
Every other item is commented out with # and works on its default. Uncomment and set a value only
when you want to see particular network cards or disks -- the full list is in the table in the next
section.
khan.host value fails quietlyEven with a wrong value the agent process stays up normally. It is just that the server does not
appear in the console. After starting, confirm Connected. in the log
(see Starting and stopping).
The Settings in the khan-sys-agent.conf File
The settings in the khan-sys-agent.conf file are as follows.
Setting (khan-agent.conf) | Environment variable | Description | Default |
|---|---|---|---|
khan.host | OMAPM_HOST | Enter the IP of the OPENMARU APM server. Or, when entering a domain, http:// or ws:// (for TLS, https:// or wss://) | |
khan.port | OMAPM_PORT | Enter the port number of the OPENMARU APM server. | |
khan.tls | OMAPM_TLS | Whether TLS is enabled | false |
khan.default.network.name | OMAPM_DEFAULT_NETWORK_NAME | Specifies the default network card e.g. eth0 | |
agent.compress.type | OMAPM_AGENT_COMPRESS_TYPE | The compression algorithm | snappy |
khan.netstat | OMAPM_NETSTAT | Whether network monitoring is on (netstat) | true |
khan.network.interfaces | OMAPM_NETWORK_INTERFACES | Monitors only the configured network interfaces e.g. eth0,eth1,ens192,lo,tun0,vxlan_sys_4789 | Every interface |
khan.disk.mounts | OMAPM_DISK_MOUNTS | Monitors only the configured mounted disks e.g. /,/home,/data,/var/lib/docker/containers,C,D | |
khan.allow.commands | OMAPM_ALLOW_COMMANDS | Restricts the commands the agent may run e.g. service,systemctl | |
| — | OMAPM_NAME | The SYS agent name, used to distinguish agents when two or more are installed on one machine (applies only to the OPENMARU SYS container image) |
Configuring the System Agent's Plugins
Up to here, operating system resources (CPU, memory, disk, network) are already collected. Plugins are turned on to see the other products running on that server as well.
| Plugin | What it makes visible | What the target product needs |
|---|---|---|
| Apache | Request count, response code distribution, worker state, mod_jk | Open mod_status and mod_info to localhost |
| NGINX | Request count, active connections | Open stub_status to localhost |
| HAProxy | Backend state, connection count | Configure the listen stats page |
| MySQL | Session count, slow queries, InnoDB state | A read-only account plus performance_schema and the slow log |
| CUBRID | Broker and database state | support_mon_statistic=YES in cm.conf, plus turning it on in the console |
| Docker | CPU, memory, and network per container | Read permission on docker.sock |
| CRI-O | The same (OpenShift 3.6+) | Read permission on crio.sock |
| containerd | The same (Kubernetes) | Read permission on containerd.sock |
Do not turn on what you do not use. A plugin that is on asks the target product for its state periodically, so turning one on for a product that is not there keeps piling collection errors into the log.
The Order for Turning a Plugin On
1) Put # in front of the line for the plugin in plugins/disabled.txt   ← commenting out = turning on
2) Write the connection details in plugins/<plugin>.conf/config.properties
3) Change the configuration on the target product (the third column of the table above)
4) Restart the agent with bin/kill.sh then bin/start.sh
disabled.txt is, as the name says, "the list to turn off"The plugins written in the file are turned off. To turn one on, delete that line or put # in
front of it to comment it out. This is easy to get the wrong way round.
Enabling Plugins
To configure which plugins are used, set them in the plugins/disabled.txt file as below.
- The plugins/disabled.txt file
#
# name to disable plugin
#

khan-plugin-apache
khan-plugin-nginx
khan-plugin-docker
khan-plugin-crio
khan-plugin-containerd
khan-plugin-cubrid
khan-plugin-mysql
- Configuring the khan-plugin-apache and khan-plugin-docker plugins to be used
#
# name to disable plugin
#

#khan-plugin-apache
khan-plugin-nginx
#khan-plugin-docker
khan-plugin-crio
khan-plugin-containerd
khan-plugin-cubrid
khan-plugin-mysql
Copying the plugin zip file into the plugins directory and starting the system agent starts the plugin module. The zip file is unpacked at that point and the directory is created.
Apache Plugin Configuration
The Apache plugin's configuration uses the config.properties file under plugins/khan-plugin-apache-5.1.0/conf.
Because the configuration file can be replaced by a plugin upgrade, setting it in a config.properties file in the plugins/khan-plugin-apache.conf directory keeps the plugin files and the configuration file separate.
- The content of the config.properties configuration file
instance=apache
host=localhost
port=80
statusUrlPath=/status?auto
infoUrlPath=/server-info?server
statusUrlPath and infoUrlPath have to match the status page addresses opened on the web server. Every other item works on its default; the full list is in the table below.
| Setting | Description | Default |
|---|---|---|
| instance | The Apache instance name shown in OPENMARU APM | apache |
| host | The host name of the Apache server to collect from; using localhost is preferable | localhost |
| port | The port number of the Apache server to collect from | 80 |
| username | Not currently used | |
| password | Not currently used | |
| infoUrlPath | The URL where Apache's mod_info is configured. Set it so it can be reached from localhost. https://httpd.apache.org/docs/2.4/mod/mod_info.html | |
| statusUrlPath | The URL where Apache's mod_status is configured. Set it so it can be reached from localhost. https://httpd.apache.org/docs/2.4/mod/mod_status.html | |
| jkStatusUrlPath | Enter the URL of the Apache jkstatus page. | /jkstatus |
| modClusterManagerUrlPath | Enter the URL of the Apache mod cluster manager page. | /mod_cluster_manager |
| maxConnections | The maximum number of connections for collecting Apache information; 1 is enough | |
| maxConnectionsPerHost | The number of connections for collecting Apache information | |
| maxConnectionsPerRoute | The number of connections for collecting Apache information | |
| waitIdleCheck | The idle check wait time | |
| waitIdleClose | The idle close wait time | |
| requestTimeout | The timeout when there is no response to a request | |
| sessionTimeout | The session timeout | |
| http.status.code.log.dir | HTTP response code monitoring configuration | homepage:/data/logs/homepage:8 -- the service name shown in the console : the web server log directory path : the position of the response code (counted on whitespace) |
| http.status.code.log.exclude.url.patterns | Specifies URL patterns to exclude from response code monitoring | |
| http.status.code.log.exclude.file.patterns | Specifies log file patterns to exclude from response code monitoring |
How to Configure Apache for APM Monitoring
In the httpd.conf file, set permissions as below so the /status and /server-info URLs can be read from localhost. Set ExtendedStatus to On at the same time so that more information can be obtained from server-status.
#
# ExtendedStatus controls whether Apache will generate "full" status
# information (ExtendedStatus On) or just basic information (ExtendedStatus
# Off) when the "server-status" handler is called. The default is Off.
#
ExtendedStatus On

#
# Allow server status reports generated by mod_status,
# with the URL of http://servername/server-status
# Change the ".example.com" to match your domain to enable.
#
<Location /status>
  SetHandler server-status
  Order deny,allow
  Deny from all
  Allow from localhost
</Location>

#
# Allow remote server configuration reports, with the URL of
# http://servername/server-info (requires that mod_info.c be loaded).
# Change the ".example.com" to match your domain to enable.
#
<Location /server-info>
  SetHandler server-info
  Order deny,allow
  Deny from all
  Allow from localhost
</Location>
NGINX Plugin Configuration
The nginx plugin's configuration uses the config.properties file under plugins/khan-plugin-nginx-5.1.0/conf. Because the configuration file can be replaced by a plugin upgrade, setting it in a config.properties file in the plugins/khan-plugin-nginx.conf directory keeps the plugin files and the configuration file separate.
The content of the config.properties configuration file
instance=nginx
host=localhost
port=80
statusUrlPath=/nginx_status
statusUrlPath has to match the stub_status address configured in NGINX. Every other item works on its default; the full list is in the table below.
| Setting | Description | Default |
|---|---|---|
| instance | The nginx instance name shown in OPENMARU APM | nginx |
| host | The host name of the nginx server to collect from; using localhost is preferable | localhost |
| port | The port number of the nginx server to collect from | 80 |
| username | Not currently used | |
| password | Not currently used | |
| statusUrlPath | The URL where nginx's http_stub_status_module is configured. Set it so it can be reached from localhost. http://nginx.org/en/docs/http/ngx_http_stub_status_module.html | |
| maxConnections | The maximum number of connections for collecting nginx information; 1 is enough | 1 |
| maxConnectionsPerHost | The number of connections for collecting nginx information | |
| maxConnectionsPerRoute | The number of connections for collecting nginx information | |
| waitIdleCheck | The idle check wait time | |
| waitIdleClose | The idle close wait time | |
| requestTimeout | The timeout when there is no response to a request | |
| sessionTimeout | The session timeout |
How to Configure nginx for APM Monitoring
Because ngx_http_stub_status_module is not built by default, add the following to the nginx/conf.d/default.conf file.
    location /nginx_status {
    stub_status;
    allow 127.0.0.1;
    deny all;
}
HAProxy Plugin Configuration
The HAProxy plugin's configuration uses the config.properties file under plugins/khan-plugin-haproxy-5.1.0/conf. Because the configuration file can be replaced by a plugin upgrade, setting it in a config.properties file in the plugins/khan-plugin-haproxy.conf directory keeps the plugin files and the configuration file separate.
The content of the config.properties configuration file
#
# HAProxy status monitoring
#

instance=haproxy11
host=localhost
port=9000
username=admin
password=opennaru!2
infoUrlPath=/haproxy_stats
statusUrlPath=/haproxy_stats;csv

maxConnections=1
maxConnectionsPerHost=1
maxConnectionsPerRoute=1
waitIdleCheck=60000
waitIdleClose=120
requestTimeout=1000
sessionTimeout=1000
How to Configure HAProxy for APM Monitoring
To monitor HAProxy, a statistics page has to be configured in HAProxy.
1. omitted ...
listen stats        #Listen on all IP's on port 9000
bind 0.0.0.0:9000
mode http
balance
timeout client 5000
timeout connect 4000
timeout server 30000

       #This is the virtual URL to access the stats page
       stats uri /haproxy_stats

       #Authentication realm. This can be set to anything. Escape space characters with a backslash.
       stats realm HAProxy\ Statistics

       #The user/pass you want to use. Change this password!
       stats auth admin:openmaru

       #This allows you to take down and bring up back end servers.
       #This will produce an error on older versions of HAProxy.
       stats admin if TRUE
Cubrid Plugin Configuration
The cubrid plugin's configuration uses the config.properties file under plugins/khan-plugin-cubrid-5.1.0/conf. Because the configuration file can be replaced by a plugin upgrade, setting it in a config.properties file in the plugins/khan-plugin-cubrid.conf directory keeps the plugin files and the configuration file separate.
The content of the config.properties configuration file
cubridHome=/home/cubrid
excludedBrokers=query_editor
Leaving cubridHome empty uses the CUBRID environment variable. Every other item works on its default; the full list is in the table below.
| Setting | Description | Default |
|---|---|---|
| cubridHome | Enter the path of the cubrid home directory. | |
| excludeBrokers | Enter the names of the brokers to exclude from state collection. |
How to Configure Cubrid for APM Monitoring
In the cubrid home directory, change support_mon_statistic in conf/cm.conf to YES to enable resource monitoring of the database.
~
# support monitoring statistic (YES/NO), default NO
# If you want to use the advanced monitoring feature on CUBRID Manager,
# you should set this value to YES.

support_mon_statistic=YES
~
Turning Cubrid Monitoring On in the Console
Even after the plugin and the Cubrid side are configured, collection starts only once it is turned on in the console.
On the General tab of Settings > Monitoring Settings, change Enable Database Monitoring
under Monitoring Extensions to Yes and Save.
This one item turns on MySQL, MariaDB, and CUBRID together -- they are not turned on individually.

Docker Plugin Configuration
The Docker plugin's configuration uses the config.properties file under plugins/khan-plugin-docker-5.1.0/conf.
Because the configuration file can be replaced by a plugin upgrade, setting it in a config.properties file in the plugins/khan-plugin-docker.conf directory keeps the plugin files and the configuration file separate.
The content of the config.properties configuration file
dockerHost=unix:///var/run/docker.sock
The account running the agent has to be able to read this socket. Every other item works on its default; the full list is in the table below.
| Setting | Description | Default |
|---|---|---|
| docker.host | Enter the host name or IP of the Docker daemon. | localhost |
| docker.port | Enter the port number of the Docker daemon. | 4342 |
| docker.connect.type | Specifies whether to use the socket file the Docker Engine creates or to reach the Docker Engine over HTTP. sock and net can be used. On OpenShift, sock must be used. | sock |
| docker.sock | Specifies the socket file the Docker Engine creates. On Red Hat family Linux, the /var/run/docker.sock file is used. | /var/run/docker.sock |
| docker.cgroup.driver.type | Specifies the cgroup driver type. OpenShift 3.6 uses systemd and OpenShift 3.5 uses cgroup. |
CRI-O Plugin Configuration
The CRI-O plugin's configuration uses the config.properties file under plugins/khan-plugin-crio-5.1.0/conf.
Because the configuration file can be replaced by a plugin upgrade, setting it in a config.properties file in the plugins/khan-plugin-crio.conf directory keeps the plugin files and the configuration file separate.
- The content of the config.properties configuration file
crioHost=unix:///var/run/crio/crio.sock
OpenShift 3.6 and later use this method. Every other item works on its default; the full list is in the table below.
| Setting | Description | Default |
|---|---|---|
| crio.sock | Specifies the socket file CRI-O creates. On Red Hat family Linux, the /var/run/crio.sock file is used. | /var/run/crio/crio.sock |
CONTAINERD Plugin Configuration
The containerd plugin's configuration uses the config.properties file under plugins/khan-plugin-containerd-5.1.0/conf.
Because the configuration file can be replaced by a plugin upgrade, setting it in a config.properties file in the plugins/khan-plugin-crio.conf directory keeps the plugin files and the configuration file separate.
- The content of the config.properties configuration file
containerdHost=unix:///run/containerd/containerd.sock
namespace=k8s.io
For Kubernetes the namespace is k8s.io. Every other item works on its default; the full list is in the table below.
| Setting | Description | Default |
|---|---|---|
| containerd.sock | Specifies the socket file containerd creates. On Red Hat family Linux, the /var/run/containerd/containerd.sock file is used. | /var/run/containerd/containerd.sock |
MySQL Plugin Configuration
The containerd plugin's configuration uses the config.properties file under plugins/khan-plugin-mysql.conf.
Because the configuration file can be replaced by a plugin upgrade, setting it in a config.properties file in the plugins/khan-plugin-mysql.conf directory keeps the plugin files and the configuration file separate.
The MySQL plugin supports MySQL, MariaDB, and Percona.
Before configuring it, an account has to be created in MySQL and permissions granted.
For MySQL 5.6 or MySQL 5.7, create the user with the following command.
## create the account
mysql> CREATE USER 'openmaru'@'localhost' IDENTIFIED BY '[PASSWORD]';
For MySQL 8.0 and later, create the user using the password encryption method.
mysql> CREATE USER 'openmaru'@'localhost' IDENTIFIED WITH mysql_native_password by '[PASSWORD]';
Register the permissions.
## query the list of running sessions
mysql> GRANT PROCESS,SELECT,EXECUTE ON . TO 'openmaru'@'localhost';

## forcibly terminate a query on a running session
mysql> grant super on . to 'openmaru'@'localhost';
When performance_schema is not enabled
mysql> SHOW VARIABLES LIKE 'performance_schema';
+--------------------+-------+
| Variable_name      | Value |
+--------------------+-------+
| performance_schema | ON    |
+--------------------+-------+

mysql> GRANT SELECT ON performance_schema.* TO 'openmaru'@'localhost';
- Enabling slow log monitoring
It can be used only when log_output is TABLE.
mysql> show global variables where VARIABLE_NAME in ('slow_query_log', 'log_output');
+--------------------+-------+
| Variable_name      | Value |
+--------------------+-------+
| slow_query_log     | ON    |
| log_output         | TABLE |
+--------------------+-------+

my.conf
[mysqld]
general_log=on
log_output='TABLE'
- The content of the config.properties configuration file
#
# khan-plugin-mysql
#

# Enable remote monitoring (default: false)
#0.remote.enabled=false
0.cluster.name=
0.instance.id=om-mariadb
#  - ex) jdbc:mariadb://localhost:3306/mysql, jdbc:mysql://localhost:3306/mysql
0.jdbc.jdbcUrl=jdbc:mariadb://192.168.23.23:3306/mysql
#  - ex) org.mariadb.jdbc.Driver, com.mysql.jdbc.Driver, com.mysql.cj.jdbc.Driver
0.jdbc.driverClassName=org.mariadb.jdbc.Driver
0.jdbc.username=root
0.jdbc.password=opennaru
0.jdbc.maximumPoolSize=10
0.jdbc.minimumIdle=0
0.jdbc.validationTimeout=5000
0.jdbc.connectionTimeout=5000
0.path.my.cnf=/etc/my.cnf
- The jdbc settings follow the HikariCP options.
- A numeric prefix such as 0. is used when monitoring N MySQL instances (remote MySQL can be monitored as well as local).
- 0.instance.id=db1
- 0....
- 1.instance.id=db2
- 1....
| Setting | Description | Default |
|---|---|---|
| 0.cluster.name | With HA configured, the same name is recognized as one group | |
| 0.instance.id | A name the collection server can distinguish | Required |
| 0.jdbc.jdbcUrl | The JDBC connection URL | Required |
| 0.jdbc.driverClassName | The driver class | Required. org.mariadb.jdbc.Driver, com.mysql.cj.jdbc.Driver |
| 0.jdbc.username | The user name | Required |
| 0.jdbc.password | The password | Required |
| 0.jdbc.maximumPoolSize | The maximum pool size | 10 |
| 0.jdbc.minimumIdle | The minimum pool size | 0 |
| 0.jdbc.validationTimeout | The validation check timeout | 5000 |
| 0.jdbc.connectionTimeout | How long to wait before obtaining from the pool | |
| 0.path.my.cnf | The location of the my.conf configuration file (for local monitoring) | /etc/my.cnf |
- The JDBC driver
Replace the driver files in the directory below if they are not compatible.
- plugins/khan-plugin-mysql-5.1.0/lib/
- mysql-connector-java-8.0.30.jar
- mariadb-java-client-1.8.0.jar
Starting and Stopping the System Agent
- Starting the system agent
$ cd khan-sys-agent/bin
$ ./start.sh
- Stopping the system agent
$ ./kill.sh
- Checking the system agent log
$ ./tail.sh
When it starts normally, the following three appear in the log in turn.
| What to check | What appears in the log |
|---|---|
| Did the plugins turn on as intended | status: enable or status: disable per plugin |
| Did it connect to the APM server | Trying to connect : wss://… followed by Connected. |
| Did collection start | Successfully Connected. |
If Connected. does not appear, first check the khan.host and khan.port values in
khan-sys-agent.conf and the firewall. The agent's process stays up even when it cannot connect.
If a plugin you never turned on shows as enable, or the other way round, check
plugins/disabled.txt again and restart the agent.
Inline Installation of the System Agent
When installing the system agent on many servers, copying and pasting one command is faster. The file does not have to be downloaded and moved to each server.
Under Agent installation files in Settings > Guides & Downloads, click the
Copy install command button on the OPENMARU APM System Agent line.
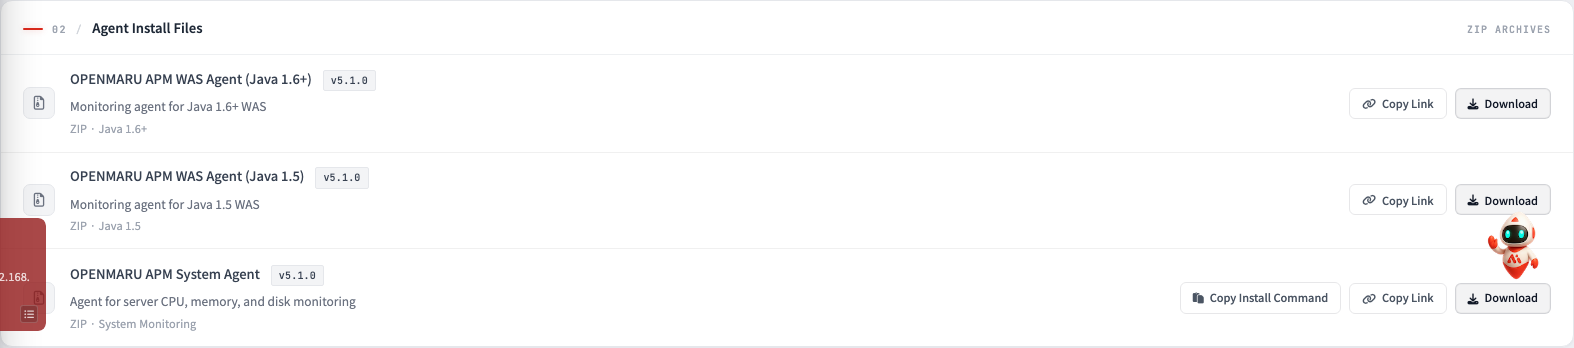
Installation Summary
| Item | Description |
|---|---|
| Collection server IP | 192.168.30.6 |
| Managing Linux user details | khansys(1106) / khan(1105) |
| System agent server IP | 192.168.2.9 |
| Installation directory | /svc/test/khan-agent |
| Plugins used | n,n,n,n,n,n,nApache,Nginx,Docker,Crio,Containerd,Cubrid,MySQL |
## paste the text copied to the clipboard
$ bash <(curl -s http://192.168.30.6/monitoring/api/agent/download/sysInstall) \
  khansys 1106 \
  khan 1105 \
  192.168.2.9 \
  192.168.30.6 \
  /svc/test/khan-agent \
  n,n,n,n,n,n,n \
  http://192.168.30.6/monitoring/resources/khan-sys-agent-5.1.0.zip

Starting installation.
########################
User : khansys
UID : 1106
Group : khan
GID : 1105
BIND IP : 192.168.2.9
TARGET IP : 192.168.30.6
Installed Path : /tmp/khan-agent/khan-sys-agent
Eabled Plugins |
  Apache	: n
  Nginx		: n
  Docker	: n
  Crio		: n
  Containerd	: n
  Cubrid	: n
  MySQL		: n
Start Install? (y/n) [n] :